To use your export file for Logos, you will need to make sure the necessary information is entered in the SecureGive system. Logos requires that member numbers and fund numbers are entered to be able to import transactions to their database.
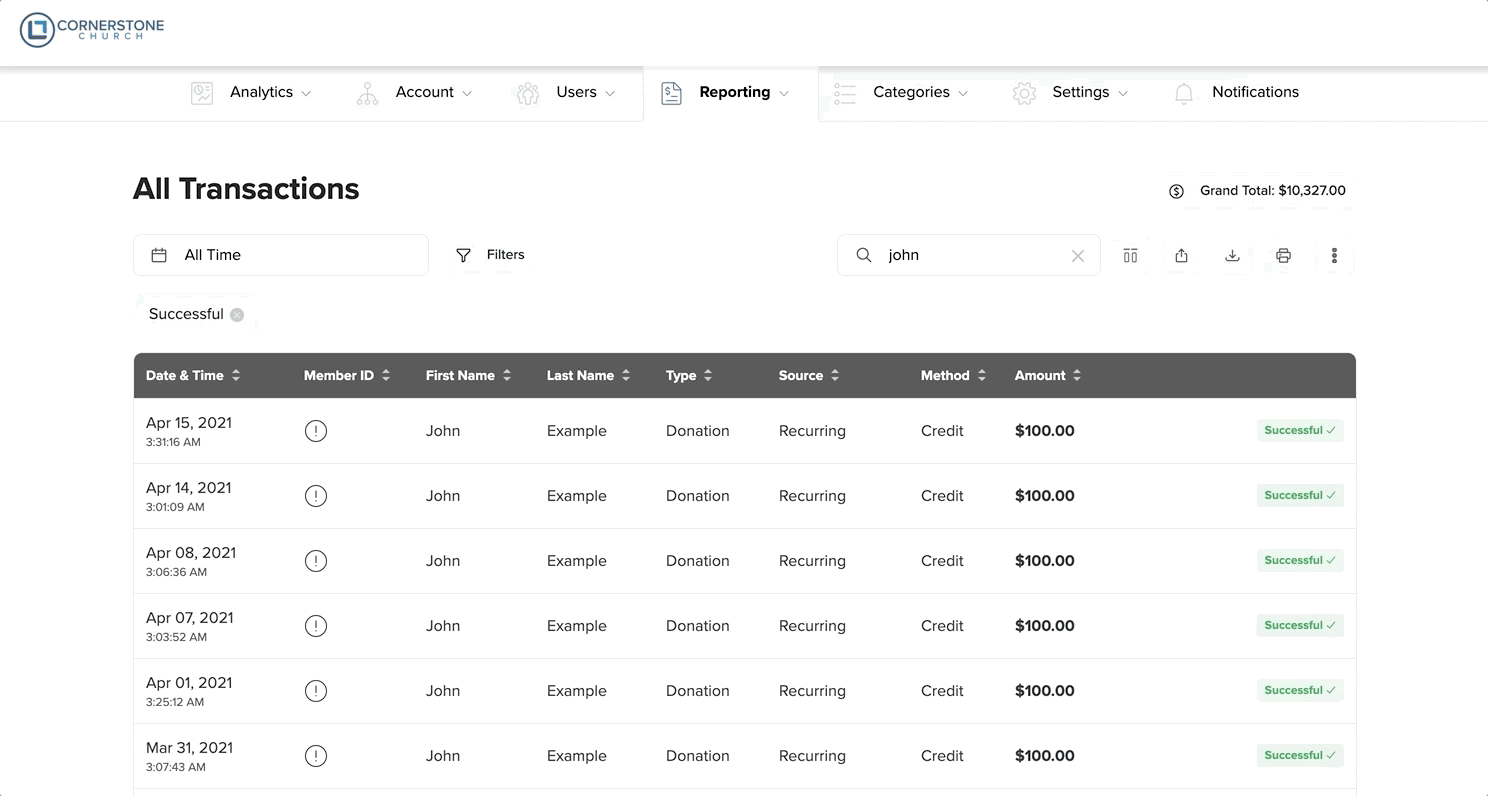
To Connect Member IDs: You will need to input the Logos Member ID into the Member ID field for each member profile in SecureGive. You will only have to do this one time for each member, and it will stay connected to them for all future transactions. Do this by clicking the exclamation point in the Member ID column from the “All Transactions” page, and then enter their Member ID and choose the Update Member ID button.
You can also add a Member ID from the donor's profile by clicking the Add Member ID link, entering their Member ID, and then clicking the Update Member ID button. You can also click the Edit pencil at the top right, scroll down to the Logos Member ID blank, and then input the Member ID there. Be sure to select Save.
Fund Number: To connect a fund number, you will go to Categories > Donations or Categories > Purchases. Once on the “Donation Categories” or “Purchase Categories” page, you will click the Edit Category button next to the name of the category that you need to connect a fund number to. Then enter in the Fund Number from Logos in the Logos Category ID blank and click “Save Changes” at the bottom.
Once the Member and Fund numbers are saved, you will go to Reporting > All Transactions and use the date selector to choose the dates you’d like to export. You’ll use the “Export to Logos” button to save your Logos file to the computer. From here, you’ll need to follow the Logos import instructions.
SecureGive will not track what dates you have exported, so we suggest that you set up a schedule for exporting. We also suggest that you save each file with a name that includes the export dates for easy tracking.